x

How to Dot and Dab Insulated Plasterboard - A Complete Guide

insulated plasterboard

Sometimes, your brick walls aren't enough to keep the cold out of the house. You might need an insulation layer on your walls to keep you comfortable and safe.

Luckily, installing insulated plasterboards is a rather simple process, which almost anyone can do. It will save you a lot of money while providing comfort.

Here's your guide on the dot and dab method and installing your insulated plasterboard.

6 Steps to Dot and Dab Insulated Plasterboard

There are many ways to plaster an insulated plasterboard directly onto your wall.

The dot and dab technique is the easiest installation method for insulation features. You'll be fixing plasterboard onto the wall without having to drill or use studs on your brick wall.

You would need the following tools for a successful and professional dot and dab:

With these six simple steps, you can have your insulated plasterboard attached to your walls and keep yourself comfy at home.

Buy Insulated Plasterboards Now

1: Prepare the Wall

Before fixing plasterboard onto a wall, you must ensure that your wall is well-prepared.

Paint a coat of polyvinyl acetate (PVA) mixed with water. It's best to follow the manufacturer's recommendation for the ratios.

The preparation will ensure that your wall won't take moisture out of your adhesive.

Before fixing the plasterboard, you must wait for the wall to dry to prevent moisture from coming into contact with the plaster. While waiting, you can work on the next steps.

2: Cut the Boardsinstalling insulated plasterboards

When doing this step, we recommend setting your insulated plasterboard on a flat surface, like the floor. Measure the wall from one corner going to where it should go upright.

Then, mark those measurements on your plasterboard.

Cut your plasterboard to the correct size using a Stanley knife or saw.

You can keep the board properly levelled using a straight edge. It should easily break off when you bend the two halves.

Cutting is usually minimal, especially when applying it on a flat wall. Sometimes, you have to make a cut on the plasterboard for a window or a door.

Remember to measure the edges from the previous board. Do this before making any marks to keep your boards clean.

3: Mix the Adhesive

Directions for mixing drywall adhesive may vary depending on the brand.

Try to follow the instructions provided before experimenting with consistencies. These factors include measurements and ratios.

Your goal is to get a thick and creamy consistency. Its thickness will affect its hold on your boards.

If the mix is too runny, add a bit more adhesive. If it's too thick, add water.

4: Apply the Adhesive Using the Dot and Dab Method

Once the PVA is completely dry, add the necessary markings to know where your board will go. These vertical and horizontal lines guide where you'll be dabbing your plaster dots.

Dot and dab plasterboard adhesive along the lines you've made. We recommend having a solid line formed using the adhesive.

This extra step prevents a cavity from forming and keeps the direct bond between surfaces. It also prevents bugs from nesting between the boards and walls.

Take note of the gap at the bottom of your wall where your skirting board will go.

To keep this space, you should dot and dab plasterboard adhesive just above the skirting level. The standard size for a skirting board is around 145mm from the floor.

Once you have a full line for each side, you can begin applying adhesive to the centre. Dot and dab plasterboard adhesive every 20cm to 30cm.

Your dabs should be big enough to support the plasterboard. Also, it's important to note how the adhesive will spread once you press the board on it.

PRO-TIP: Make your dabs bigger as you go down. The lower parts of your plasterboard usually take on more weight. They need all the support they can get.

When you get to the bottom of the bucket, your mix might be a little runny. It's usually because of the water that's settled at the bottom.

Add more adhesive and adjust your mix as needed.

5: Add the Plasterboard

insulated plasterboardsPress the plasterboard onto the adhesive dabs. The pressure will spread the pre-applied adhesive to keep the plasterboard in place.

Use a spirit level against the plasterboard to ensure that the plasterboard is properly straight. Then, you can use the feather edge to tap on the plasterboard to ensure that it's firmly fixed onto the wall.

Be careful when you tap the boards to ensure they don't crack. Any gap formed would make the plasterboard inefficient with insulation.

The first plasterboard you stick on is the most important. It will set the standard for the rest of your boards. Keep your level tool close while you work.

Repeat steps 4 and 5 for the other boards to form the plasterboard wall. Mix more plasterboard adhesive as needed.

6: Finish the Wall

After your adhesive dries, your plasterboard wall is ready for skimming. You can do this through tiling, painting, or adding wallpaper.

This step provides an extra layer of protection and some degree of soundproofing.

However, the dot and dab method is not recommended if you're installing your insulation for soundproofing.

This method can form a cavity, especially if the edges aren't well done. It would only amplify sound, which isn't ideal for insulation.

Buy Plasterboards Now

What Is the Dot and Dab Method?

The dot and dab method is also known as dry lining. It's the process of attaching your insulated or rigid insulation boards to have a direct bond to your brick or concrete wall.

You won't need any building timber stud frame. This method relies heavily on the dot and dab adhesive on the wall for the installation process.

The adhesive dots spread out as you set the plasterboard onto the wall, filling in the gaps and keeping your boards in place.

There are other ways of fixing plasterboard onto a wall. The most well-known are the following:

  • Screwing the plasterboard onto battens or studs
  • Nailing the plasterboard onto the surface with studs
  • Glueing the pre-insulated plasterboard (thermal insulation plasterboard)

It's considered a great alternative to wet plastering. This method is usually the professionals' first choice when they work with plaster.

The dot and dab method is an easier process, making it beginner-friendly.

Some Considerations When Using the Dot and Dab Method

There are a few things to consider to achieve that professional dot and dab method. It's important to adjust to them before you start dry-lining your walls.

Working With Dry Wall Adhesive

Besides needing a sturdy adhesive brand, the dot and dab method also relies on how you mix, dot, and dab your plaster.

Take note of how much plaster you dot and dab onto the wall and where your plasterboard will need more support.can you dot and dab insulated plasterboard

The rule of thumb would be to put more adhesive on places that would need to support more weight.

Any moisture from your wall would immediately affect your dry-lining process. The dot and dab method requires a few preparations before you can start dabbing adhesive on the wall.

It's also affected by how much water you use for your plaster. Without the correct consistency, your plasterboard walls might end up falling.

The dot and dab method heavily relies on your plaster. So, you'll need to get your mixing and technique right to keep your plasterboard up.

Flat Surfaces and Gaps

You won't always dot and dab plasterboard onto a flat surface. There are other elements on the surface of your wall which you should consider.

Planning out your plasterboard wall helps you know how to use the method effectively.

You'll have to cut your plasterboards before starting the dot and dab process. That way, you can properly measure where you'll dot and dab your adhesive.

How you cut your plasterboard will affect where you dot and dab your drywall adhesive on your wall.

Make sure you have a feather edge nearby. It will help you even your plasterboard out and reduce gaps between your boards and the wall.

Make sure that the edges are properly supported. Having a solid line can help while you dot and dab your adhesive.

It's also important to mind the gap between the plasterboard and the floor. Skirting boards are always placed there to cover the joints that attach the wall to the floor.

Fixing Boards onto Walls

It isn't easy to fix plasterboard onto a wall, especially without a stud wall. If a plasterboard is fixed to studs, it could weaken the plasterboard.

There may be times when the gap between the wall and the plasterboard isn't enough for fixings to work.

It's when the dot and dab method is highly recommended to easily fill in those small gaps.

A specialist dot and dab plasterboard fixing will also help support the plasterboard. The end product should have your plasterboard securely attached to the walls, so they don't fall.

Frequently Asked Questions

You might have more questions about how to dot and dab your plasterboard onto the wall.

We've gathered the commonly asked questions to help you with your dots and dabs.

Can You Apply the Dot and Dab Technique to a Ceiling?

dot and dab plasterboards
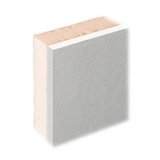
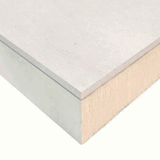
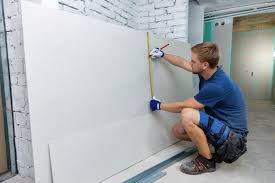
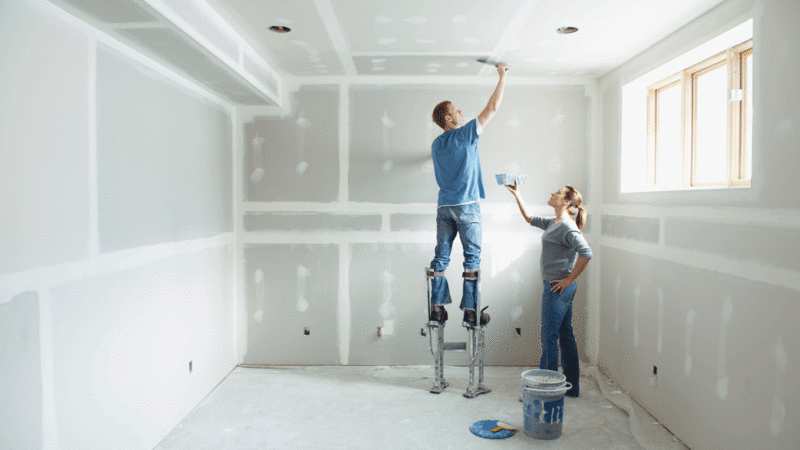
It's possible to use the dot and dab technique on your ceilings. However, this isn't the best choice. The adhesive used for this technique isn't strong enough to hold your plasterboard up, especially with gravity working against it.

It's best to use alternative methods. We recommend using nails or screws to securely hold your plasterboard.

Can You Dot and Dab Foiled-back Plasterboard?

NO, you can't use this method on a foiled-back plasterboard.

The bond between the foil and the board isn't strong enough. If you use this method, your board could peel off over time.

It's best to mechanically fix these boards onto studs or battens. Attach them onto a timber or metal studwork for extra support.

How Much Dot and Dab Adhesive Is Required?

The general rule is to use 12.5kg adhesive for a 2.88m2 or 2400mm x 1200mm board (8 x 4 plasterboard)

Drywall adhesives are usually sold in 25kg bags, which should be good for two plasterboards.

It's best to get a bit more than enough to have a little extra.

Can You Dot and Dab on Wallpaper?

No, you shouldn't use this method on top of your wallpapers. Its moisture can remove wallpaper from the wall.

If this happens, your wallpaper will get damp and rip. Any attached plasterboard becomes a safety hazard and could fall on someone.

Remove your wallpaper before anything else. If the wallpaper is difficult to remove, you can use a streamer to soften it.

Apply your PVA and water mix to prevent the wall from absorbing moisture.

Conclusion:

Having great insulation for your home doesn't have to be expensive. You can easily install insulated plasterboard walls on your own.

Remember that the dot and dab method is only one of the many techniques to fix the plasterboard onto your wall.

However, if you're looking for an easy way, you'll have this guide to return to. 

Happy dabbing!

Buy Insulated Plasterboards Now


Leave A Reply

Your feedback is greatly appreciated, please comment on our content below. Your email address will not be published. Required fields are marked *

Request a Call back

closeclose