- Blogs
- What are Different Types of Tile Backer Boards and How to Install Them?
What are Different Types of Tile Backer Boards and How to Install Them?

Tile backer board is a material that provides a durable and waterproof base for installing tiles on walls, floors, countertops, and other surfaces. The tile backer board prevents moisture from damaging the underlying structure and ensures a long-lasting and durable tile installation.
There are different types of tile backer boards available, each with its own advantages and disadvantages. This article will discuss some of the most common types of tile backer boards and how to install them properly.
Cement Board
Cement board is one of the most popular and widely used types of tile backer board. It is made from cement and sand, reinforced by fibreglass mats on both sides. It is impervious to water and can withstand high temperatures and pressures. It is ideal for wet areas such as tub surrounds, showers, and floors.
How to Install Cement Board
To install cement board, you will need the following tools and materials:
- Cement board sheets
- Thin-set mortar
- Notched trowel
- Utility knife
- Jigsaw with a carbide blade
- Chalk line
- Drill with a carbide bit
- Cement board screws
- Fiberglass mesh tape
- Tile adhesive
- Tiles
Follow these steps to install cement board:
- Plan the layout of the cement board sheets. Avoid aligning the joints of the cement board with the joints of the subfloor or the wall studs. Stagger the sheets like bricks for better stability. Cut the sheets to fit around obstacles or in small spaces using a utility knife or a jigsaw.
- Apply thin-set mortar to the subfloor or the wall using a notched trowel. Spread enough mortar for one sheet at a time and create parallel ridges with the notched side of the trowel.
- Place the cement board sheet over the mortar while it is still wet. Press it firmly and evenly into the mortar. Leave a 1/4-inch gap between the sheets and around the perimeter of the room.
- Fasten the cement board to the subfloor or wall using cement board screws. Use a drill with a carbide bit to make pilot holes every 8 inches along the edges and every 12 inches in the field of the sheet.
- Cover the joints between the sheets with fibreglass mesh tape. Press the tape into the thin-set mortar that squeezes out from under the sheets.
- Apply tile adhesive over the cement board using a notched trowel. Follow the manufacturer’s instructions for mixing and applying the adhesive.
- Install the tiles over the adhesive following your desired pattern. Use spacers to maintain even gaps between the tiles.
- Allow the adhesive to cure for at least 24 hours before grouting.
Fibre Cement Board
Fibre cement board is a variation of cement board that is made from compressed cement and sand, reinforced with wood fibres throughout. It has similar properties to cement board, but it is lighter in weight and easier to cut and fasten. It is only available in 1/4-inch thickness, so it is suitable for walls and countertops, but not for floors.
How to Install Fiber Cement Board
To install a fibre cement board, you will need the same tools and materials as for the cement board, except for thin-set mortar. Instead, you will need construction adhesive to attach the fibre cement board to the subfloor or wall.
Follow these steps to install fibre cement board:
- Plan and cut the fibre cement board sheets as described for the cement board.
- Apply construction adhesive to the subfloor or wall using a caulking gun. Apply enough adhesive for one sheet at a time in a zigzag pattern.
- Place the fibre cement board sheet over the adhesive while it is still wet. Press it firmly and evenly into the adhesive. Leave a 1/8-inch gap between the sheets and around the perimeter of the room.
- Fasten the fibre cement board to the subfloor or wall using cement board screws as described for the cement board.
- Cover the joints between the sheets with fibreglass mesh tape as described for the cement board.
- Apply tile adhesive over the fibre cement board using a notched trowel as described for the cement board.
- Install and grout the tiles as described for the cement board.
Glass Mat Gypsum Board
Glass mat gypsum board is another type of tile backer board that works well in damp areas, but not in areas that are continuously wet or submerged in water. It is made from water-resistant silicone-treated gypsum, covered by fibreglass mats on both sides. It has a waterproof coating on one side that faces the tiles. It is lighter than cement board and easier to cut and fasten. It is available in 1/2-inch and 1/4-inch thicknesses.
How to Install Glass Mat Gypsum Board
To install a glass mat gypsum board, you will need the same tools and materials as for a cement board, except for thin-set mortar. Instead, you will need a special type of tile adhesive that is compatible with a glass mat gypsum board.
Follow these steps to install glass mat gypsum board:
- Plan and cut the glass mat gypsum board sheets as described for the cement board. Make sure to use the side with the waterproof coating as the tile side.
- Apply tile adhesive to the subfloor or wall using a notched trowel. Spread enough adhesive for one sheet at a time and create parallel ridges with the notched side of the trowel.
- Place the glass mat gypsum board sheet over the adhesive while it is still wet. Press it firmly and evenly into the adhesive. Leave a 1/8-inch gap between the sheets and around the perimeter of the room.
- Fasten the glass mat gypsum board to the subfloor or wall using cement board screws as described for cement board.
- Cover the joints between the sheets with fibreglass mesh tape as described for the cement board.
- Apply tile adhesive over the glass mat gypsum board using a notched trowel as described for the cement board.
- Install and grout the tiles as described for the cement board.
Water-Resistant Drywall
Water-resistant drywall is a type of tile backer board that is suitable for areas that are occasionally damp, but not constantly wet, such as kitchen backsplashes or bathroom walls. It is made from a water-repellent gypsum core covered by water-resistant paper. It is similar to regular drywall, but more resistant to moisture and mould. It is available in 1/2-inch thickness and 4 x 8-foot sheets.
How to Install Water-Resistant Drywall
To install water-resistant drywall, you will need the following tools and materials:
- Water-resistant drywall sheets
- Drywall screws
- Drywall knife
- Drywall saw
- Chalk line
- Drill with a drywall bit
- Fiberglass mesh tape
- Joint compound
- Tile adhesive
- Tiles
Follow these steps to install water-resistant drywall:
- Plan the layout of the water-resistant drywall sheets. Align the joints of the drywall with the wall studs or ceiling joists. Cut the sheets to fit around obstacles or in small spaces using a drywall knife or a drywall saw.
- Place the water-resistant drywall sheet against the wall or ceiling. Use a chalk line to mark where the studs or joists are behind the sheet.
- Fasten the water-resistant drywall to the wall or ceiling using drywall screws. Use a drill with a drywall bit to make pilot holes every 8 inches along the edges and every 12 inches in the field of the sheet.
- Cover the joints between the sheets with fibreglass mesh tape. Press the tape into place with your fingers.
- Apply joint compound over the tape using a drywall knife. Smooth out any excess compound and let it dry completely.
- Apply tile adhesive over the water-resistant drywall using a notched trowel as described for cement board.
- Install and grout the tiles as described for the cement board.
Foam Backer Board
A foam backer board is a type of tile backer board that is made from extruded polystyrene foam or high-density polyisocyanurate foam, covered by a layer of reinforcement material on both sides, such as fabric, fleece, or cement. It is waterproof, lightweight, and easy to cut and fasten. It is suitable for walls, floors, countertops, and shower niches.
How to Install Foam Backer Board
To install foam backer board, you will need the following tools and materials:
- Foam backer board sheets
- Utility knife
- Shears
- Cement board screws and washers
- Sealant
- Fiberglass mesh tape
- Tile adhesive
- Tiles
Follow these steps to install foam backer board:
- Plan and cut the foam backer board sheets as described for the cement board.
- Apply tile adhesive to the subfloor or wall using a notched trowel. Spread enough adhesive for one sheet at a time and create parallel ridges with the notched side of the trowel.
- Place the foam backer board sheet over the adhesive while it is still wet. Press it firmly and evenly into the adhesive. Leave a 1/8-inch gap between the sheets and around the perimeter of the room.
- Fasten the foam backer board to the subfloor or wall using cement board screws and washers. Use a drill with a carbide bit to make pilot holes every 12 inches along the edges and every 16 inches in the field of the sheet. Insert the screws through the washers and into the foam backer board until they are flush with the surface.
- Apply sealant to the gaps between the sheets and around the perimeter of the room. Smooth out any excess sealant with a wet finger or a sponge.
- Cover the joints between the sheets with fibreglass mesh tape. Press the tape into the sealant while it is still wet.
- Apply tile adhesive over the foam backer board using a notched trowel as described for the cement board.
- Install and grout the tiles as described for the cement board.
HardieBacker Board
HardieBacker board is a type of tile backer board that is made from Portland cement, sand, cellulose fibres, and water-resistant additives. It is durable, mould-resistant, and fire-resistant. It is suitable for walls, floors, countertops, and shower areas.
How to Install HardieBacker Board
To install the HardieBacker board, you will need the following tools and materials:
- HardieBacker board sheets
- Thin-set mortar
- Notched trowel
- Utility knife
- Carbide-tipped scoring knife
- Straight edge
- Chalk line
- Drill with a carbide bit
- Backer-on screws
- Fiberglass mesh tape
- Tile adhesive
- Tiles
Follow these steps to install the HardieBacker board:
- Plan the layout of the HardieBacker board sheets. Avoid aligning the joints of the HardieBacker board with the joints of the subfloor or the wall studs. Stagger the sheets like bricks for better stability. Cut the sheets to fit around obstacles or in small spaces using a utility knife or a carbide-tipped scoring knife.
- Apply thin-set mortar to the subfloor or wall using a notched trowel. Spread enough mortar for one sheet at a time and create parallel ridges with the notched side of the trowel.
- Place the HardieBacker board sheet over the mortar while it is still wet. Press it firmly and evenly into the mortar. Leave a 1/8-inch gap between the sheets and around the perimeter of the room.
- Fasten the HardieBacker board to the subfloor or wall using backer-on screws. Use a drill with a carbide bit to make pilot holes every 8 inches along the edges and every 12 inches in the field of the sheet.
- Cover the joints between the sheets with fibreglass mesh tape. Press the tape into place with your fingers.
- Apply tile adhesive over the HardieBacker board using a notched trowel as described for the cement board.
- Install and grout the tiles as described for the cement board.
Explore Our Range of Fiber Cement Tile Backer Boards
We have a selection of Fiber Cement Boards available for purchase on our website, https://www.buyinsulationonline.co.uk/
Cembloc Cembacker - Cement Tile Backer Board
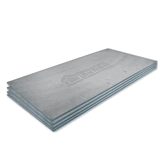
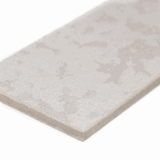
 Cembloc Cembacker is a top-quality cement tile backer board designed for tile installation on walls and floors. Made from a blend of cement, sand, and reinforcing fibres, it offers exceptional durability and stability.
These boards excel in moisture, weather, and fire resistance, outperforming plasterboard and plywood. They are A1-rated for fire safety, emit no toxic gases during fires, and provide protection against seasonal changes and sunlight.
Cembacker boards also extend the life of insulation materials. They are easy to assemble, cut, and install, making them ideal for various applications, including wet rooms, wall finishes, pre-fabricated buildings, and more.
ProWarm Insulated Tile Backer Board
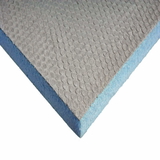
 ProWarm Tile backer boards feature XPS insulation covered with fiberglass mesh on both sides, making them waterproof and ideal for wet rooms and bathrooms.
These durable boards resist moisture, offer superior thermal insulation, and have high compressive strength, suitable for floor insulation. They also have excellent levelling properties.
ProWarm BACKER-PRO boards are compatible with underfloor heating systems, reducing energy costs on uninsulated subfloors. They are easy to install, come in various thicknesses, and provide soundproofing benefits.
Warmup Insulated Tile Backer Boards
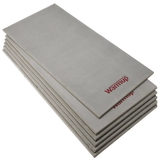
 Warmup underfloor insulation boards with low thermal conductivity prevent heat loss through subfloors, enhancing the efficiency of underfloor heating.
They are ideal for electric underfloor heating systems and offer excellent support for tile adhesive, plaster, and levelling compounds.
These boards are versatile, and suitable for internal wall insulation, bathrooms, and underfloor heating applications. They are easy to cut and install, water-resistant, and reduce heat loss while improving the response time of underfloor heating.
Marmox MultiBoard - Waterproof Insulation
 Marmox Multiboard is a versatile insulation board with a high-density extruded polystyrene core and a cement polymer mortar surface with embedded fibreglass mesh.
It provides thermal insulation, and moisture resistance, and prevents surface condensation and mould growth. These boards can be used as tile backer boards, ensuring a secure bond with tile adhesive or plaster.
They are suitable for various applications, such as internal walls, floors, ceilings, wet environments, and underfloor heating systems. Marmox Multiboards are lightweight and easy to handle, offering excellent decoupling properties.
Curved Board By Marmox - 1200 x 600 x 20mm Curved Multiboard
 Marmox Curved Board is designed for creating cost-effective and seamless curved designs in construction projects. With a thickness of 20mm and unique slits, it can be folded to achieve radii as small as 200mm.
This makes it ideal for insulating archways and curved walls while maintaining energy efficiency.
It serves as a tile backer or plastering panel, especially suitable for bathroom applications. Installation is simple with adhesives, making it versatile for various projects, including curved walls, archways, and partition walls.
Marmox SoundBoard - Soundproofing Floor Insulation
 Marmox Sound Board is a premium acoustic insulation solution for floors, minimizing sound transmission and enhancing thermal performance. It features an extruded polystyrene core with fibreglass mesh and SBR rubber layers.
This board effectively reduces impact sound between floors and maintains a comfortable environment. It is lightweight, easy to handle, and compatible with various floor finishes.
Ideal for residential and commercial spaces, the Marmox Sound Board offers high sound reduction, making it suitable for shared living spaces and under-tile heating systems. Installation is straightforward with adhesive application, ensuring a peaceful environment.
Frequently Asked Questions
Q: What is the importance of using tile backer boards in a tiling project?
A: Tile backer boards offer thermal insulation and provide a perfect substrate for tile installation. They are superior to plasterboard in terms of durability and moisture resistance.
Q: What are the different thickness options available for tile backer boards?
A: Tile backing boards are available in 6mm, 10mm, and 12mm thickness options.
Q: Which brands offer reliable tile backer boards in the UK?
A: Some popular brands that offer tile backer boards in the UK include wedi, Marmox, Jackoboard, and Schluter Kerdi Board.
Q: What are the benefits of using wedi tile backer boards?
A: Wedi tile backer boards not only provide a perfect substrate for tile installation but also offer excellent thermal insulation and moisture resistance properties.
Q: What are backer board washers and why are they used?
A: Backer board washers are used for securing the tile backer boards to the wall or floor. They help to ensure a flat and secure installation.
Q: Can the tile backer boards be used in wetrooms and bathrooms?
A: Yes, tile backer boards are commonly used in wetrooms and bathrooms due to their moisture resistance properties.
Q: Are tile backer boards suitable for underfloor heating installation?
A: Yes, tile backer boards can be used as a base for underfloor heating systems. They provide insulation properties and help to distribute heat evenly.
Q: How do tile backer boards compare to plasterboard?
A: Tile backer boards are superior to plasterboard in terms of durability, moisture resistance, and ease of use for tiling projects.
Q: Can I use tile adhesive to attach the tiles directly to the tile backer boards?
A: Yes, tile adhesive can be used to attach the tiles to the tile backer boards. It provides a strong and durable bond.
Conclusion
The tile backer board is an essential component of any tile installation project, as it provides a stable and waterproof base for the tiles.
Depending on your needs and preferences, you can choose from different types of tile backer board, such as cement board, fibre cement board, glass mat gypsum board, water-resistant drywall, foam backer board, or HardieBacker board.
Each type has its own advantages and disadvantages, as well as its own installation method. By following this article, you can learn how to install the tile backer board correctly and achieve a professional-looking result.

Samuel Hitch
Managing Director
Buy Insulation Online.
Leave A Reply
Your feedback is greatly appreciated, please comment on our content below. Your email address will not be published. Required fields are marked *
